


Black Garlic! Regular Garlic's Edgy and Sophisticated Cousin
Detour ahead issue #17, Cooking with Ethan, Black Garlic Roast Chicken, and Korean Cream Cheese Garlic Bread

Please tap the ❤️ or the little restack icon at the top or bottom of this post. When you do, it helps more readers discover the newsletter—thank you for spreading the word!
You know I love trying out new ingredients—especially the ones that sound a little mysterious or feel like a fun cooking challenge. Well, this week, I finally got around to experimenting with black garlic. And let me say… I’m officially a fan.
If you’ve never heard of black garlic, you’re not alone. It’s not a new ingredient, but it’s one of those things that’s quietly been hanging out on specialty food shelves, waiting for foodies like us to give it a try.
It's made by taking regular garlic bulbs and aging them under controlled heat and humidity for several weeks. What comes out is almost unrecognizable - the cloves turn inky black, get soft and sticky like dried fruit, and taste nothing like what you'd expect.
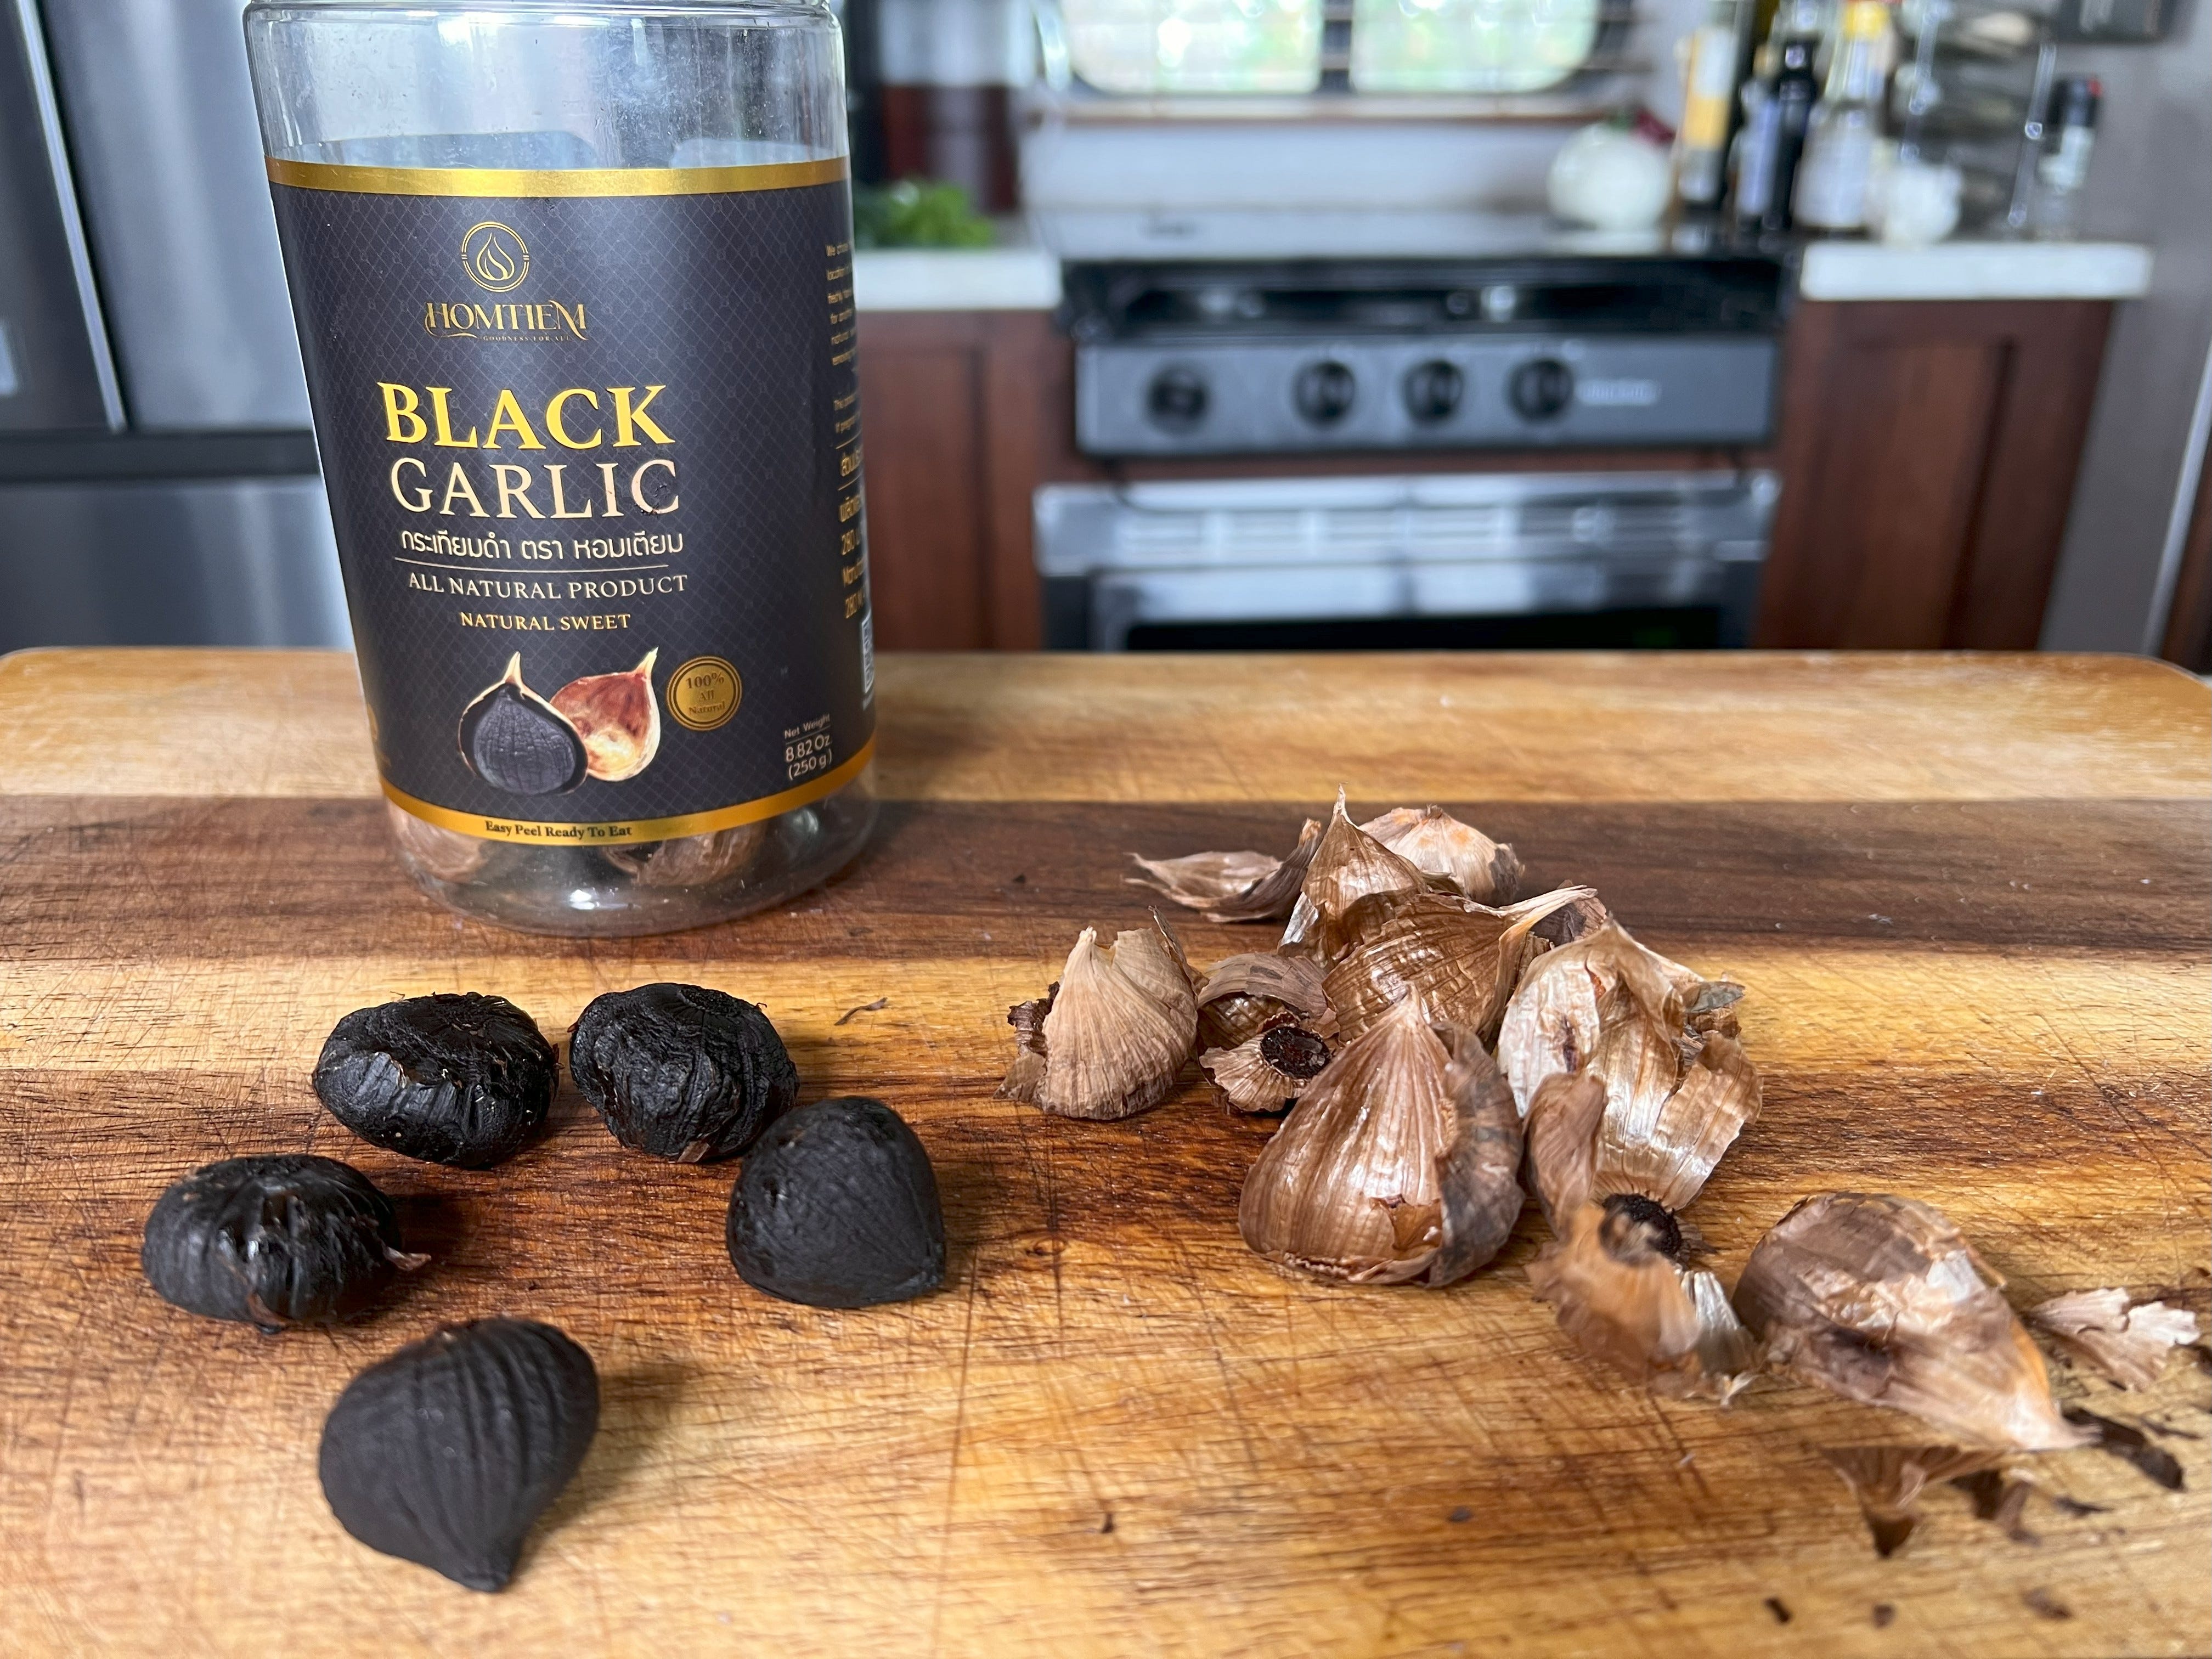
Black garlic isn't sharp or pungent at all. Instead, it's sweet and complex, with flavors reminiscent of molasses, balsamic vinegar, and tamarind. It has this rich, umami quality that's similar to aged soy sauce or miso paste.
This dramatic transformation happens through the Maillard reaction - the same process that gives you those delicious flavors when you sear a steak or toast bread. The garlic's natural sugars and amino acids react over time, creating hundreds of new flavor compounds while taming all those harsh sulfur notes that make raw garlic so intense.
Black garlic has been around in Korea for centuries, used in both traditional medicine and cooking, but it's really caught on with chefs and home cooks worldwide in recent years. You can eat it straight from the clove, spread it on bread like jam, or work it into sauces and marinades. It's incredibly versatile because it bridges that gap between sweet and savory in ways regular garlic never could.
I’ve tasted black garlic in restaurant dishes before, but I’d never actually cooked with it myself until now. It has a rich umami flavor that’s hard to describe until you try it. I’m already dreaming up ways to add it to pasta, mashed potatoes, or maybe even a spread for burgers. It’s definitely going to make another appearance in my kitchen soon.
But this weekend…
My oldest son,
, came over, and we spent the afternoon making this Black Garlic Roasted Chicken and a batch of Korean garlic bread to go with it.I love hanging out with Ethan in the kitchen. He is my partner in crime when it comes to cooking—especially anything with an Asian twist. He’s always up for trying new ingredients and bold flavors, so black garlic was right up our alley.
Side Note— I was heartbroken to hear about Anne Burrell’s passing. When the boys were little, we’d pile into bed and watch her on the Food Network. She made cooking feel fun and approachable, and her energy and love of food played a big part in sparking their interest in cooking. Some of our earliest cooking memories together started with her.
Ethan likes to come over to my house when he wants to experiment with new recipes—usually the messy ones—because he'd much rather dirty up my kitchen than his. 😂 And when he’s cooking, you just know the kitchen is going to look like a tornado rolled through by the time we're done. But honestly? I wouldn’t have it any other way.
We had a great time talking about his new job, girls, food, and tweaking the recipe together like we always do. He won’t be able to join us on our Big Bend trip, so it felt good to get some quality time in before Jacob, Olivia, Ken, and I hit the road next week. More on that to come…
Here are the recipes:
Black Garlic Roast Chicken
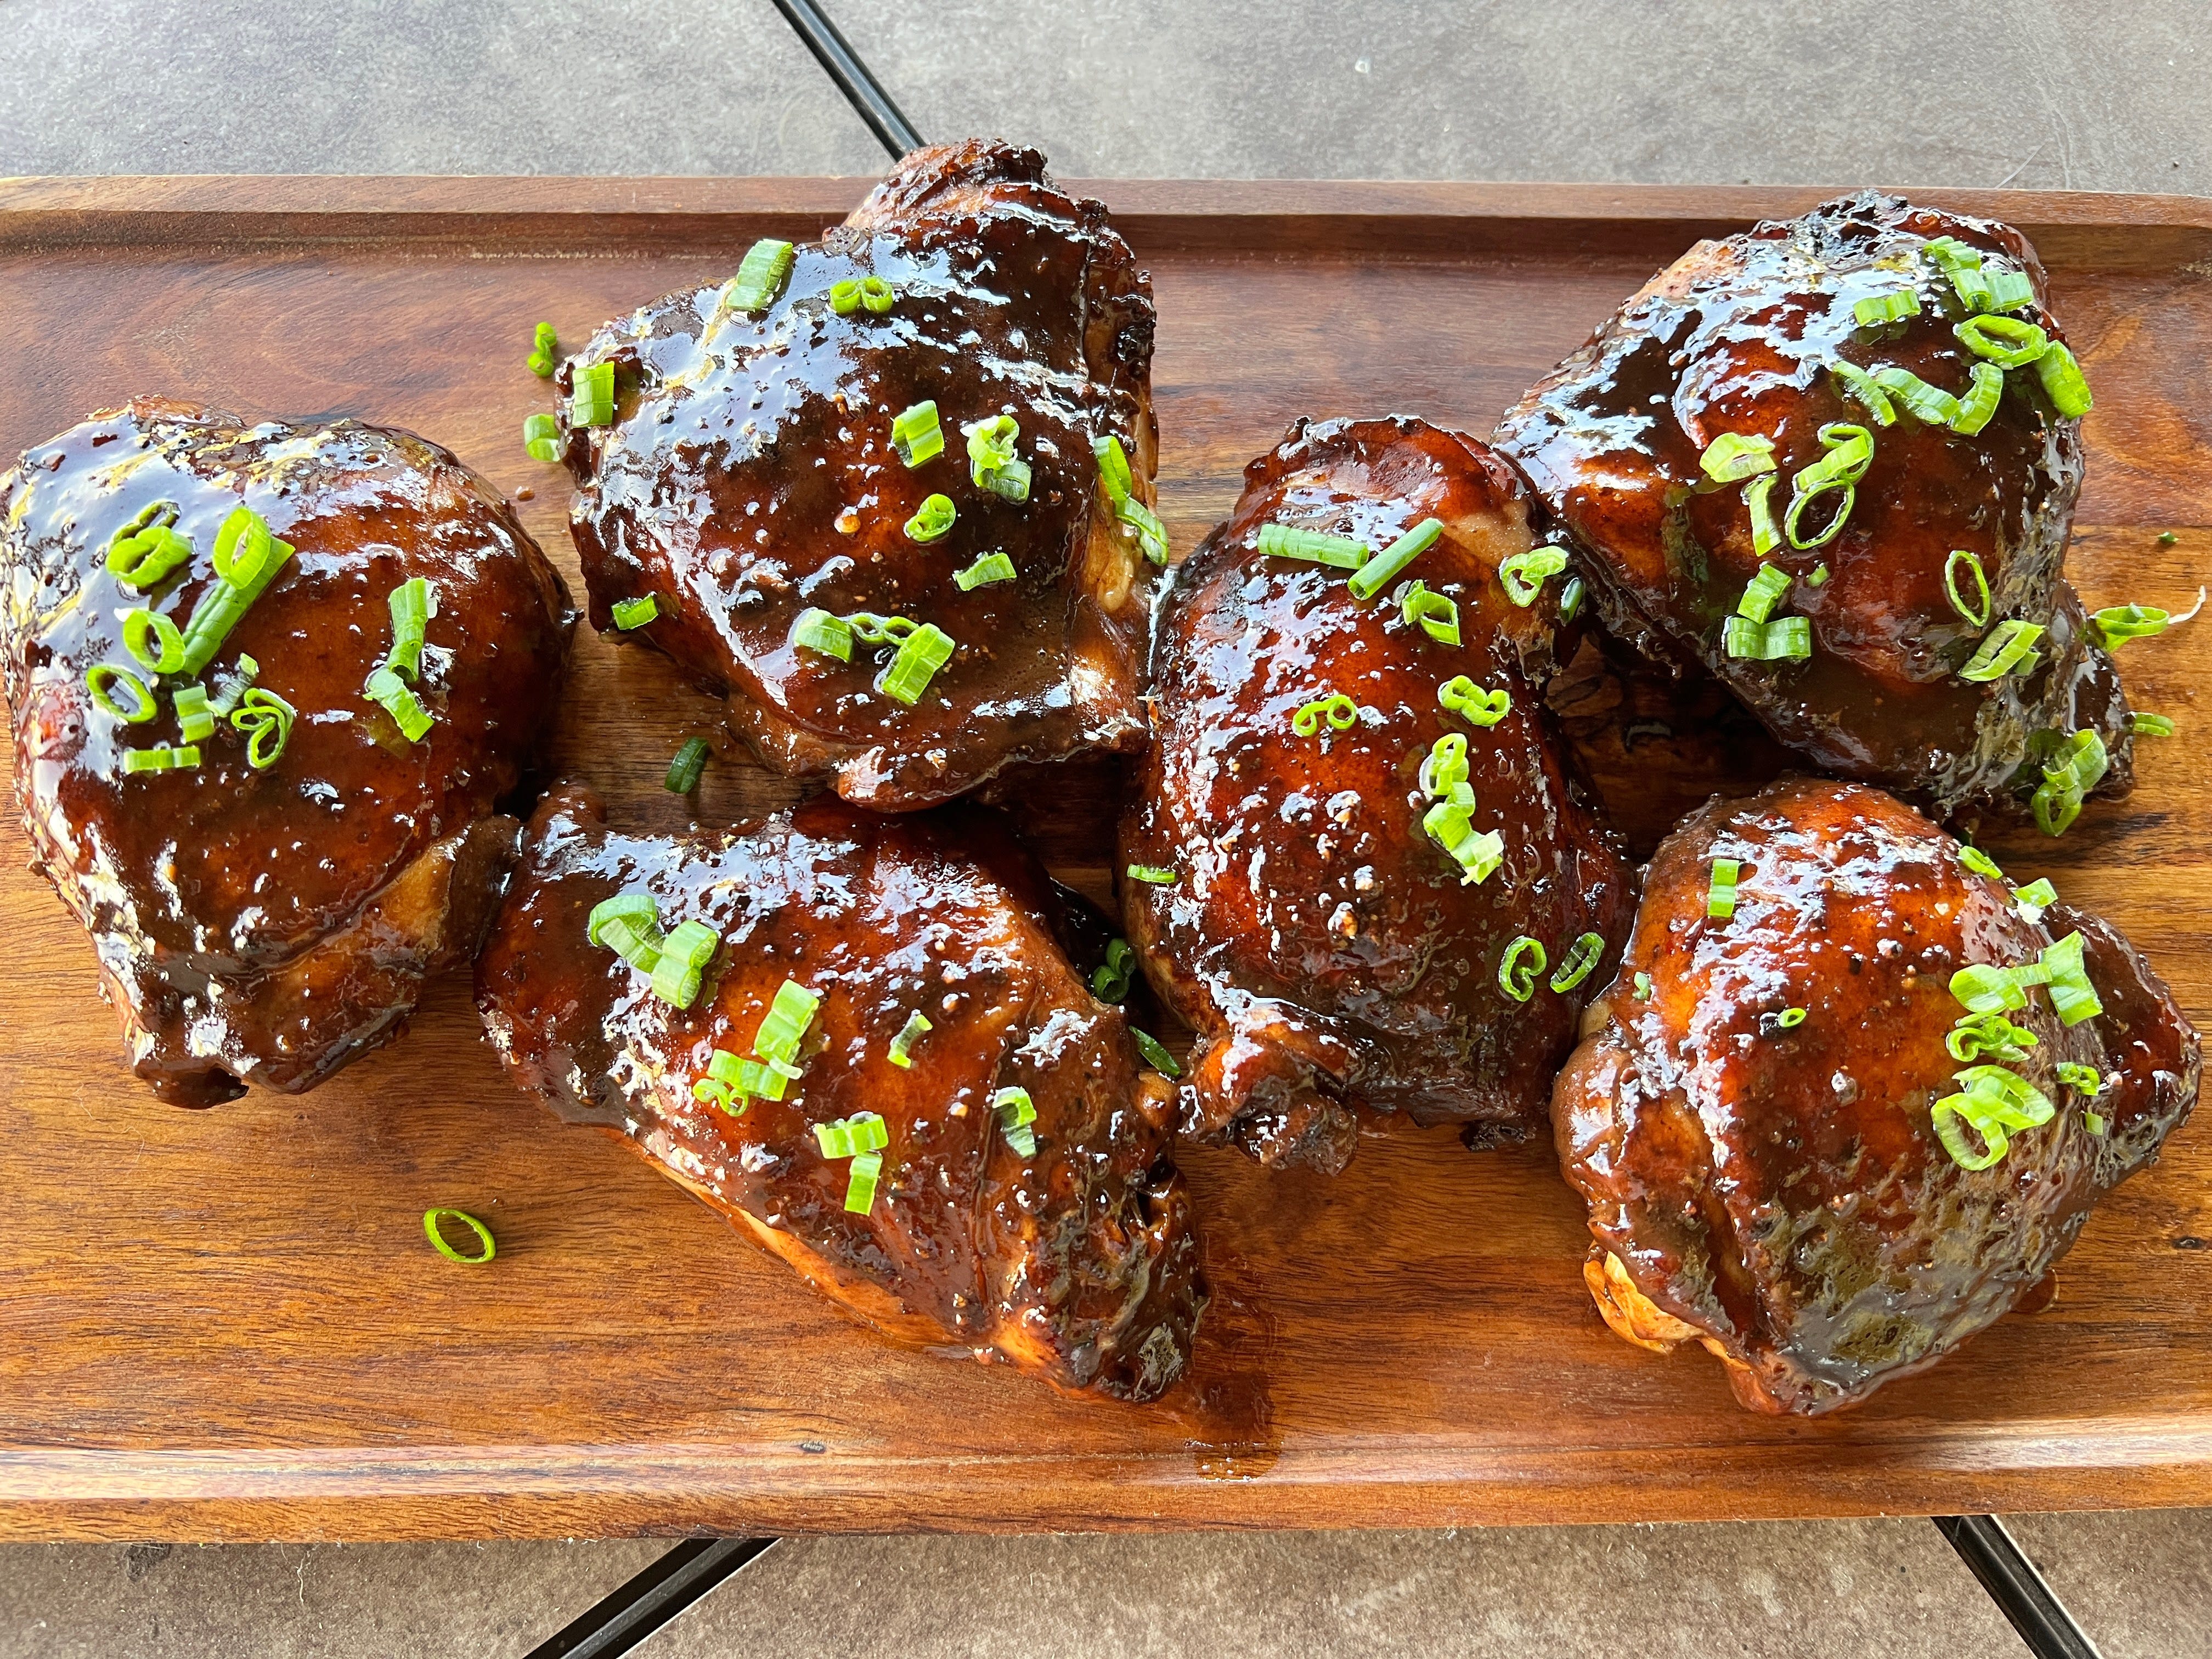
The chicken is marinated in an Asian-inspired blend that infuses the meat with sweet, savory flavors and that distinctive molasses-like richness of black garlic. After roasting, we deglazed the pan with the remaining marinade to create a glossy, flavorful glaze that coats the tender chicken.
The result was incredibly juicy meat with deep, complex flavors and a beautiful lacquered finish.
Ingredients
skin-on bone-in chicken (I usually cut up a whole chicken, but since it was just the 3 of us, I just used legs and thighs. Use whatever cut your family likes)
4 tablespoons soy sauce
1 tablespoon Hoisin sauce
1 teaspoon sesame oil
1 tablespoon honey
½ tablespoon Oyster sauce
5 black garlic cloves
2 white garlic cloves
1 teaspoon Kosher salt
½ teaspoon black pepper
½ teaspoon red pepper flakes, optional
sliced green onions, for serving, optional
Tip: I used a mortar and pestle to make the marinade for the chicken, but you could easily do this in a small food processor or blender.
Instructions
Mash the black garlic and fresh garlic with sesame oil and a little salt until it becomes a paste.
Stir in the soy sauce, hoisin, abalone sauce, honey, black pepper, and red pepper flakes. Taste it—it should be salty. That’s what helps create a rich, flavorful sauce as it roasts.
Lay the chicken pieces in a heavy oven-proof pan. If you are cooking in your RV kitchen like me, make sure the pan will fit into your smaller oven.
Pour on the marinade and massage it into the meat. Make sure that all of the chicken is completely coated. Cover and put it in the refrigerator for at least two hours or overnight if you can.
Let the chicken sit out for about an hour before cooking so it comes to room temperature. Preheat your oven to 375°F. Remove most of the marinade from the pan (save it—we’ll use it for the sauce) and place the chicken in the oven uncovered.
Roast for 45 minutes to an hour or until the internal temperature reaches 165°F. After 30 minutes, use an instant-read thermometer to test for doneness. Check every 10 minutes until it is fully cooked.
Once the chicken is done roasting, pull it out of the oven and set it aside. Remove the chicken pieces to a separate plate, leaving the pan juices behind.
Tent loosely with foil to keep it warm.
Place the pan with the juices on the stove over medium heat. Stir in the reserved marinade and bring it to a boil, stirring frequently. If there isn’t enough liquid, add a splash of water or chicken broth. Cook until the sauce thickens enough to coat the back of a spoon.
Return the chicken to the pan and spoon the sauce over the top. Garnish with green onions and cilantro if you like.
Korean Cream Cheese Garlic Bread
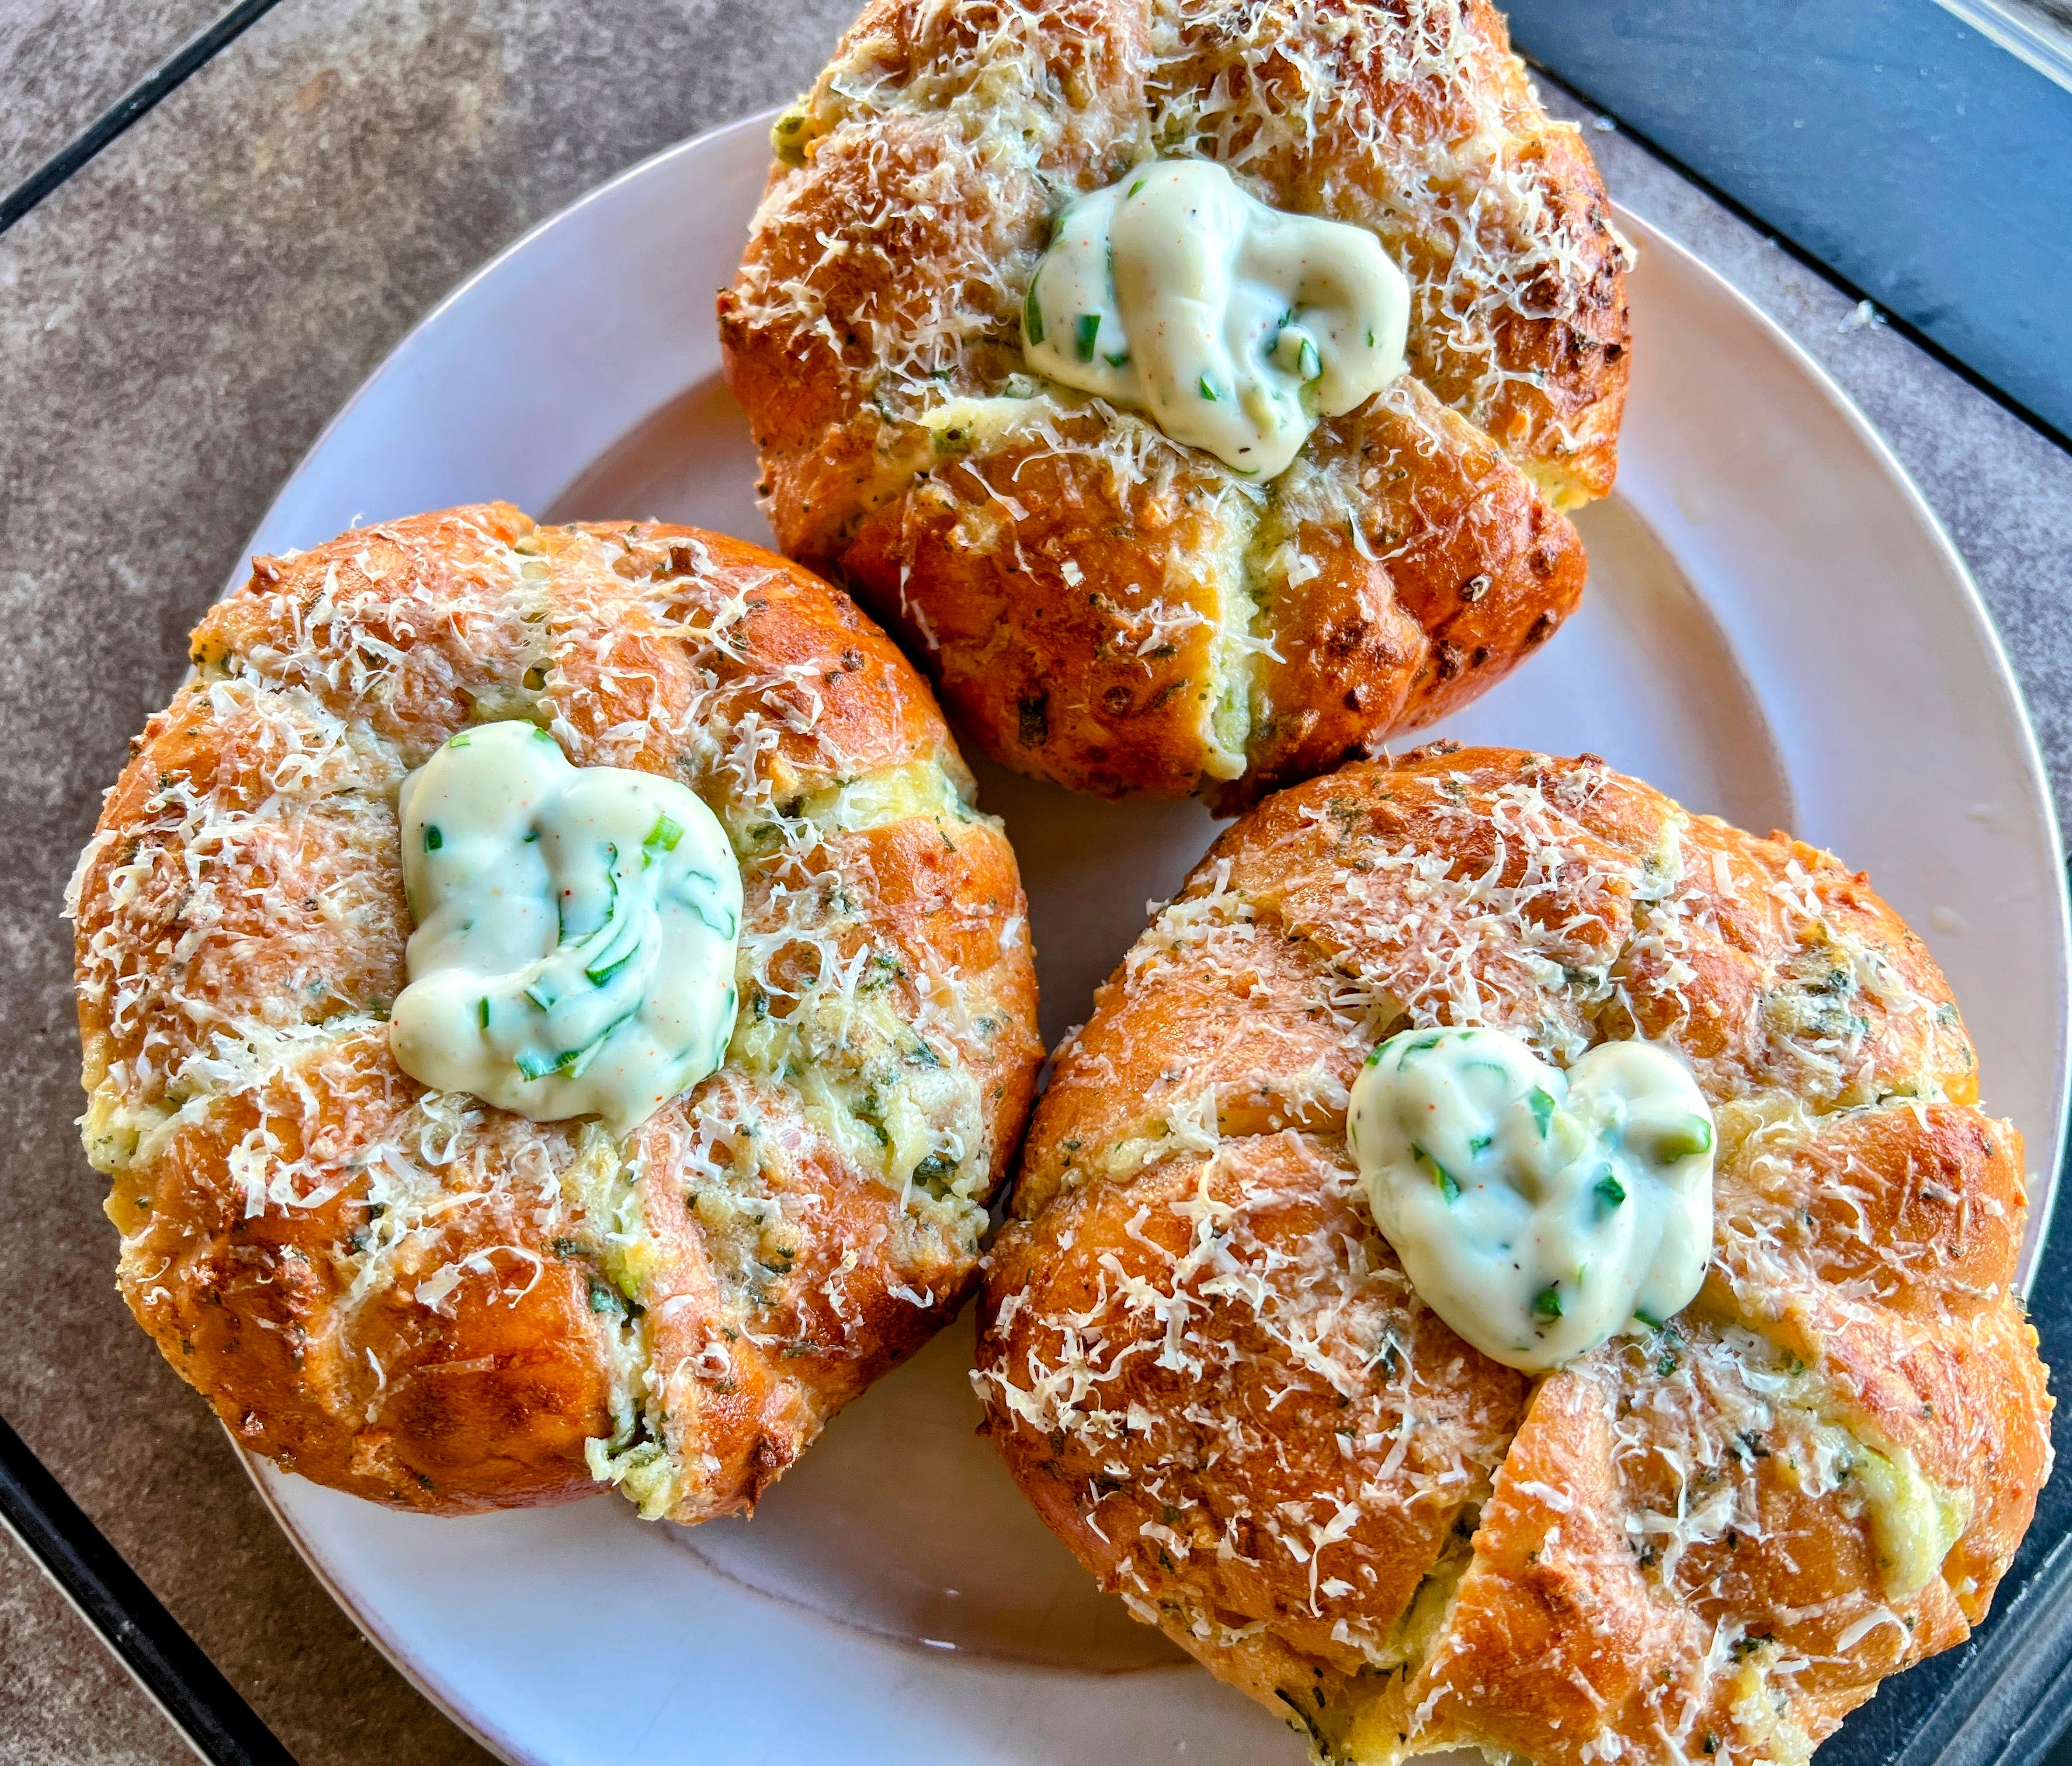
This over-the-top, sweet-and-savory Korean garlic bread is what happens when cream cheese meets buttery garlic custard and gets baked into soft brioche buns. They are rich, messy, and completely worth the effort.
Ingredients
For the bread:
6 plain brioche buns or kaiser rolls (medium-sized, uncut)
Cream Cheese Filling:
8 oz cream cheese, softened
3 ½ tablespoons sugar
Garlic Butter Custard:
5 tablespoons butter, divided
2 tablespoons minced garlic
1 ½ tablespoons milk
1 tablespoon mayo
3 tablespoons sugar
1 tablespoon dried parsley
1 egg, beaten
Instructions
1. Make the Cream Cheese Filling
In a medium bowl, mix the softened cream cheese with the sugar until smooth and the sugar is fully dissolved. Scoop it into a piping bag (or a zip-top bag with the corner snipped off) and set it aside.
2. Sauté the Garlic
Melt 1 tablespoon of the butter in a small pan over medium-low heat. Add the garlic and cook just until it softens and smells amazing—don’t let it brown. Remove from the heat and let it cool slightly.
3. Melt the Remaining Butter
Melt the rest of the butter (4 tablespoons) in the microwave or on the stove. You want it fully melted and ready to stir into the custard mixture.
4. Make the Garlic Custard
In a mixing bowl, combine the sautéed garlic, melted butter, milk, mayo, sugar, parsley, and the beaten egg. Stir it all together until smooth and set it aside.
5. Prep the Buns
Preheat your oven to 350°F.
Using a serrated knife, carefully cut each bun into 6 sections, like a flower, but don’t slice all the way through. You want the bun to stay intact at the base so it holds together.
6. Fill the Buns
Pipe the cream cheese filling into each cut section of the bun. Make sure you really get it down in there—this is the good stuff. Repeat with all the buns.
7. Dip and Arrange
Gently dip each filled bun into the garlic custard mixture, making sure it’s coated on all sides. Place them on a parchment-lined baking sheet.
8. Add the Center Filling
Pipe a little dollop of the cream cheese mixture right in the center of each bun. This gives it that signature look and a little extra creamy bite in the middle.
9. Bake
Bake for about 10 minutes, or until the tops are set and golden. Remove from the oven and let them cool for 5 to 10 minutes before serving.
These are best warm, but honestly? Still delicious at room temp. They’re rich, sweet, garlicky, and super indulgent. Perfect for sharing—if you have to.


You’ll find this recipe—plus plenty more—on the blog, complete with step-by-step photos and easy-to-follow instructions.
Quote of the Week
“The only real stumbling block is fear of failure. In cooking, you’ve got to have a what-the-hell attitude.”—Julia Child
Or in other words, try it, you may like it, and if it turns into a disaster, you just try something different next time.
Reader Spotlight
Have you ever tried an ingredient just because it sounded interesting, and ended up loving it? Or spent a Saturday afternoon in the kitchen with someone you love, just making something new for the fun of it?
If you’ve cooked with black garlic before (or are inspired to try it now), I’d love to hear how it went. Maybe you have your own twist on roasted chicken or a favorite Asian-inspired dish you like to make.
And if you’re spending this weekend in the kitchen with your family—whether you’re baking bread, roasting chicken, or just sneaking bites of cream cheese filling while no one’s looking—I want to hear about that too. Send me a photo or drop a note below.
I’d love to feature your favorite recipes, new-to-you ingredients, or special kitchen memories in an upcoming post.
Well, guys, that’s all I’ve got for now! Wishing you a fantastic week ahead. If you’ve enjoyed this newsletter, I’d love it if you shared it with a friend!
Spread the word – Invite a fellow food lover or travel enthusiast to join us on this journey.
And if you try a recipe, have a question, or just want to say hello, drop a comment below—I’d truly love to hear from you! ❤️
~Holly